The first step in getting involved with RGU:Radio and running your own show is to understand how the station works and be trained up on the skills you need to run a radio show. On this page, you will be able to learn step by step the various elements using the radio studio, planning and running your show, and going live with RGU:Radio.
Introduction to the Station
RGU:Radio is based in Room 119, Aberdeen Business School and contains two main studios with a wide range of recording and broadcasting equipment. The studio is used both by the student-run radio station, as well as journalism and media courses for teaching. All students using the station will be required to undertake training and abide by all rules set for the station.
Click to Learn about the RGU:Radio Station
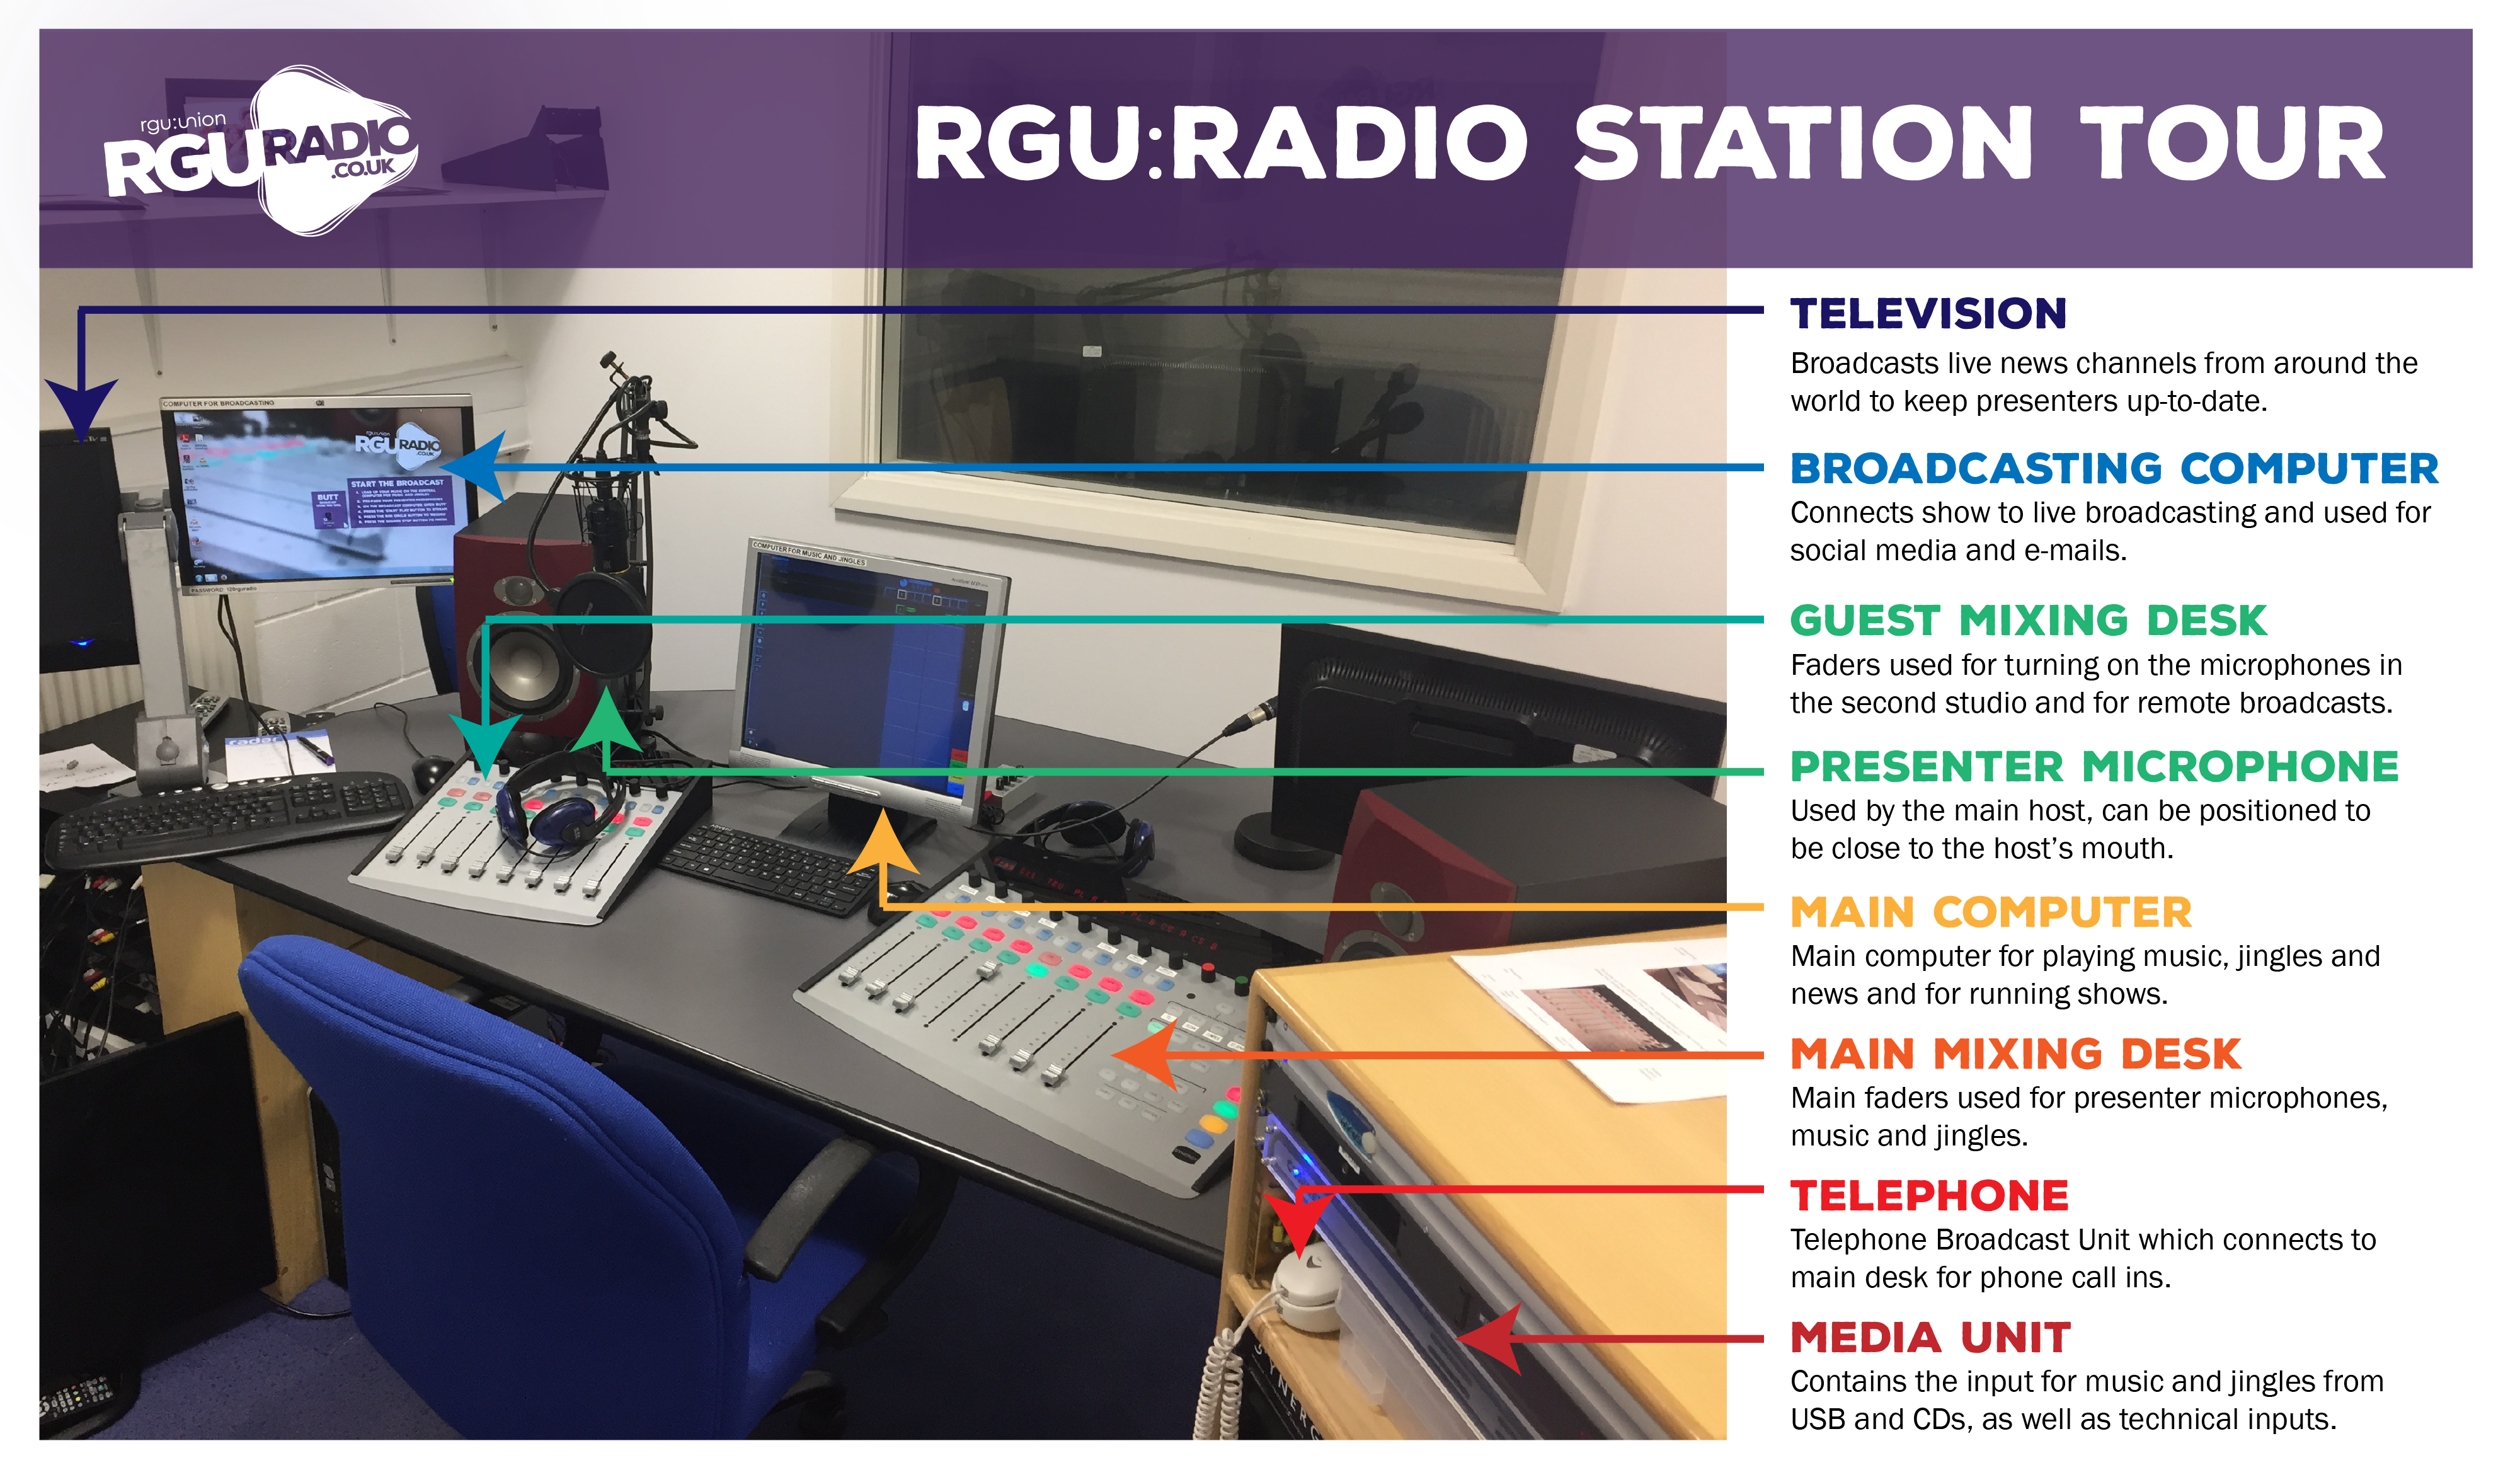
Radio Station Tour
The first thing to do is to introduce you to the station, and each of the different elements of it.
- Television: On the far left of the station, you will see a television which connects to a range of global news channels. The purpose of the TV is to allow journalists or presenters to keep up to date with the latest international news, in case of any breaking stories. Students can control the TV by pressing the on button on the front, and changing channels using the switching box.
- Broadcast Computer: Next to the TV on the left of the station, you will find the computer used for broadcasting. On this computer presenters will connect their show to the live stream using the 'Broadcast Using This Tool' (BUTT) application. This is also the computer presenters can use for connecting to social media, recording shows, and planning their shows.
- Guest Mixing Desk: On the left of the desk, there is the secondary faders which the host can use to turn on the guest studio microphones in the second studio. There is also a fader for the outside broadcasting unit 'Comrex'.
- Presenter Microphone: In the centre of the desk is the arm which holds the microphone for the main presenter. This should be positioned at a comfortable distance from the main host.
- Main Computer for Music and Jingles: In the centre of the desk is the main computer which is used to run all shows. This screen is touchscreen and the main application to be used is 'On Air' which runs all the music and jingles for shows. Presenters can use this computer to load up music and jingles, add music to the system and run their shows.
- Main Mixing Desk: On the right of the desk is the main mixing desk which has all the faders for the music, jingles and microphones. This is the desk which presenters will use most mainly for the main microphones, playing music and jingles and for pre-fading their microphones.
- Telephone: Within the Media Unit, there is a telephone which connects to the mixing desk to allow others to call into a show by calling 01224 26 3333. By pushing the 'Connect' button above the telephone, the phone call can be connected to the mixing desk and broadcast.
- Media Unit: On the right hand side of the station, there is the media unit which contains all the technical equipment which connects all the radio station systems. In this unit, there is the black computer unit for the Main Computer which students can import their music and jingles to the system.
Accessing the Radio Station
Before you can get into Room 119, Aberdeen Business School, you will need to sign out the keys. First thing to do will be to make sure that the radio station is avaliable for you to run a show or practise. You can check the timetable on the outside of the studio door, which is updated once a week, or click here to view a live update of the station timetable. If the station is free, then you can go to the security desk in Aberdeen Business School (next to the cash machine) and ask for the radio station key and sign it out.
Running the Desk
Once you are familiar with the studio itself, you will have to get to know the equipment and software which you will need to use to run a show. RGU:Radio used the Clyde Broadcasting equipment and software such as OnAir. The following shall explain each element of the station and an overview of the software.
Click to Learn About Running the Desk
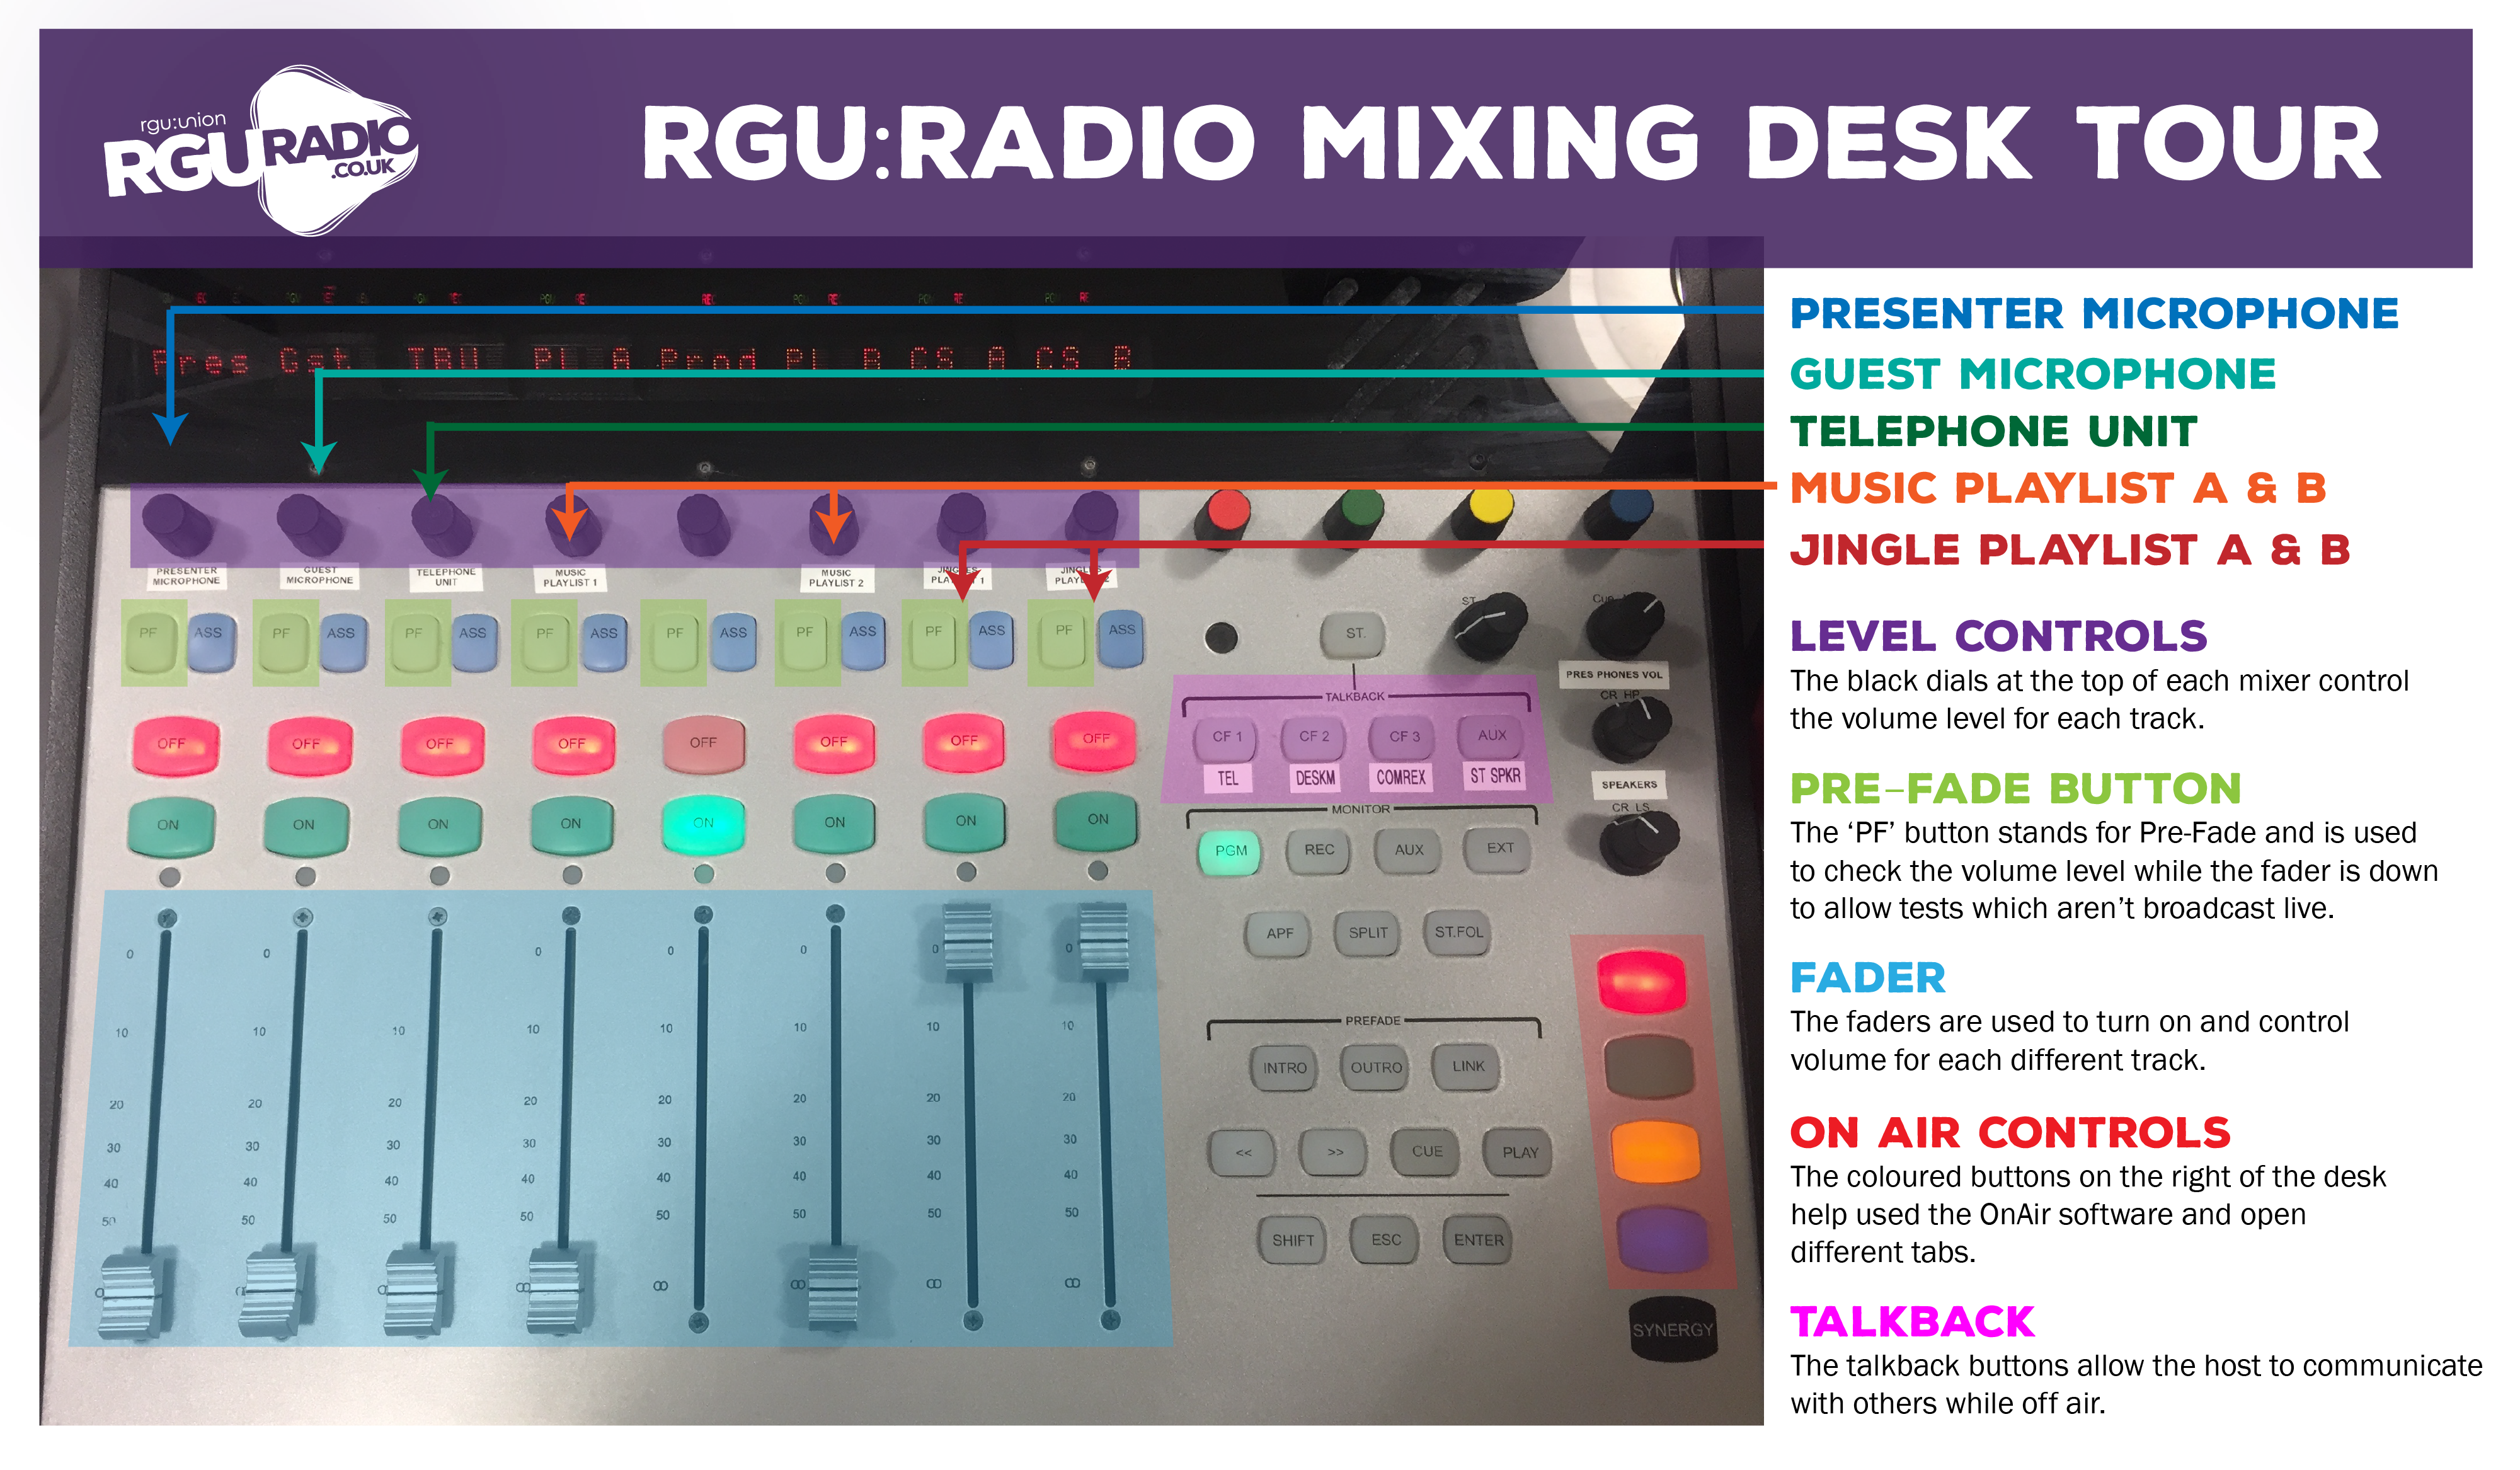
Mixing Desk Tour
Next, take a look at what each of the main controls on the mixing desk do.
- Presenter Microphone: The first fader controls the presenter microphone. The dial at the top is used to control the volume levels for the microphone, below that is the 'PF' Pre-Fade button. Before a show, a presenter would keep the fader down and push the 'PF' button and test the sound levels adjusting the black dial until the sound levels on the screen are between 5 and 6 when talking. When a presenter wants to go live, they would push the first fader up.
- Guest Microphone: The second fader is also a microphone for the guest in the main studio, and would be pre-faded before the start of a show.
- Telephone Unit: The third fader is used for the phone connection, but only has a live sound if the 'Connect' button next to the phone is pressed.
- Music Playlist A and B: The fourth and sixth fades control the music and can be used to fade between songs. Music should be loaded up onto the playlist on the Computer for Music and Jingles, and once a playlist fader goes up, the music will place automatically.
- Jingle Playlist A and B: The final two faders are used for jingles, news, sound effects or music beds, and control the two touchscreen sound stacks on the right of the Main Computer screen while using OnAir.
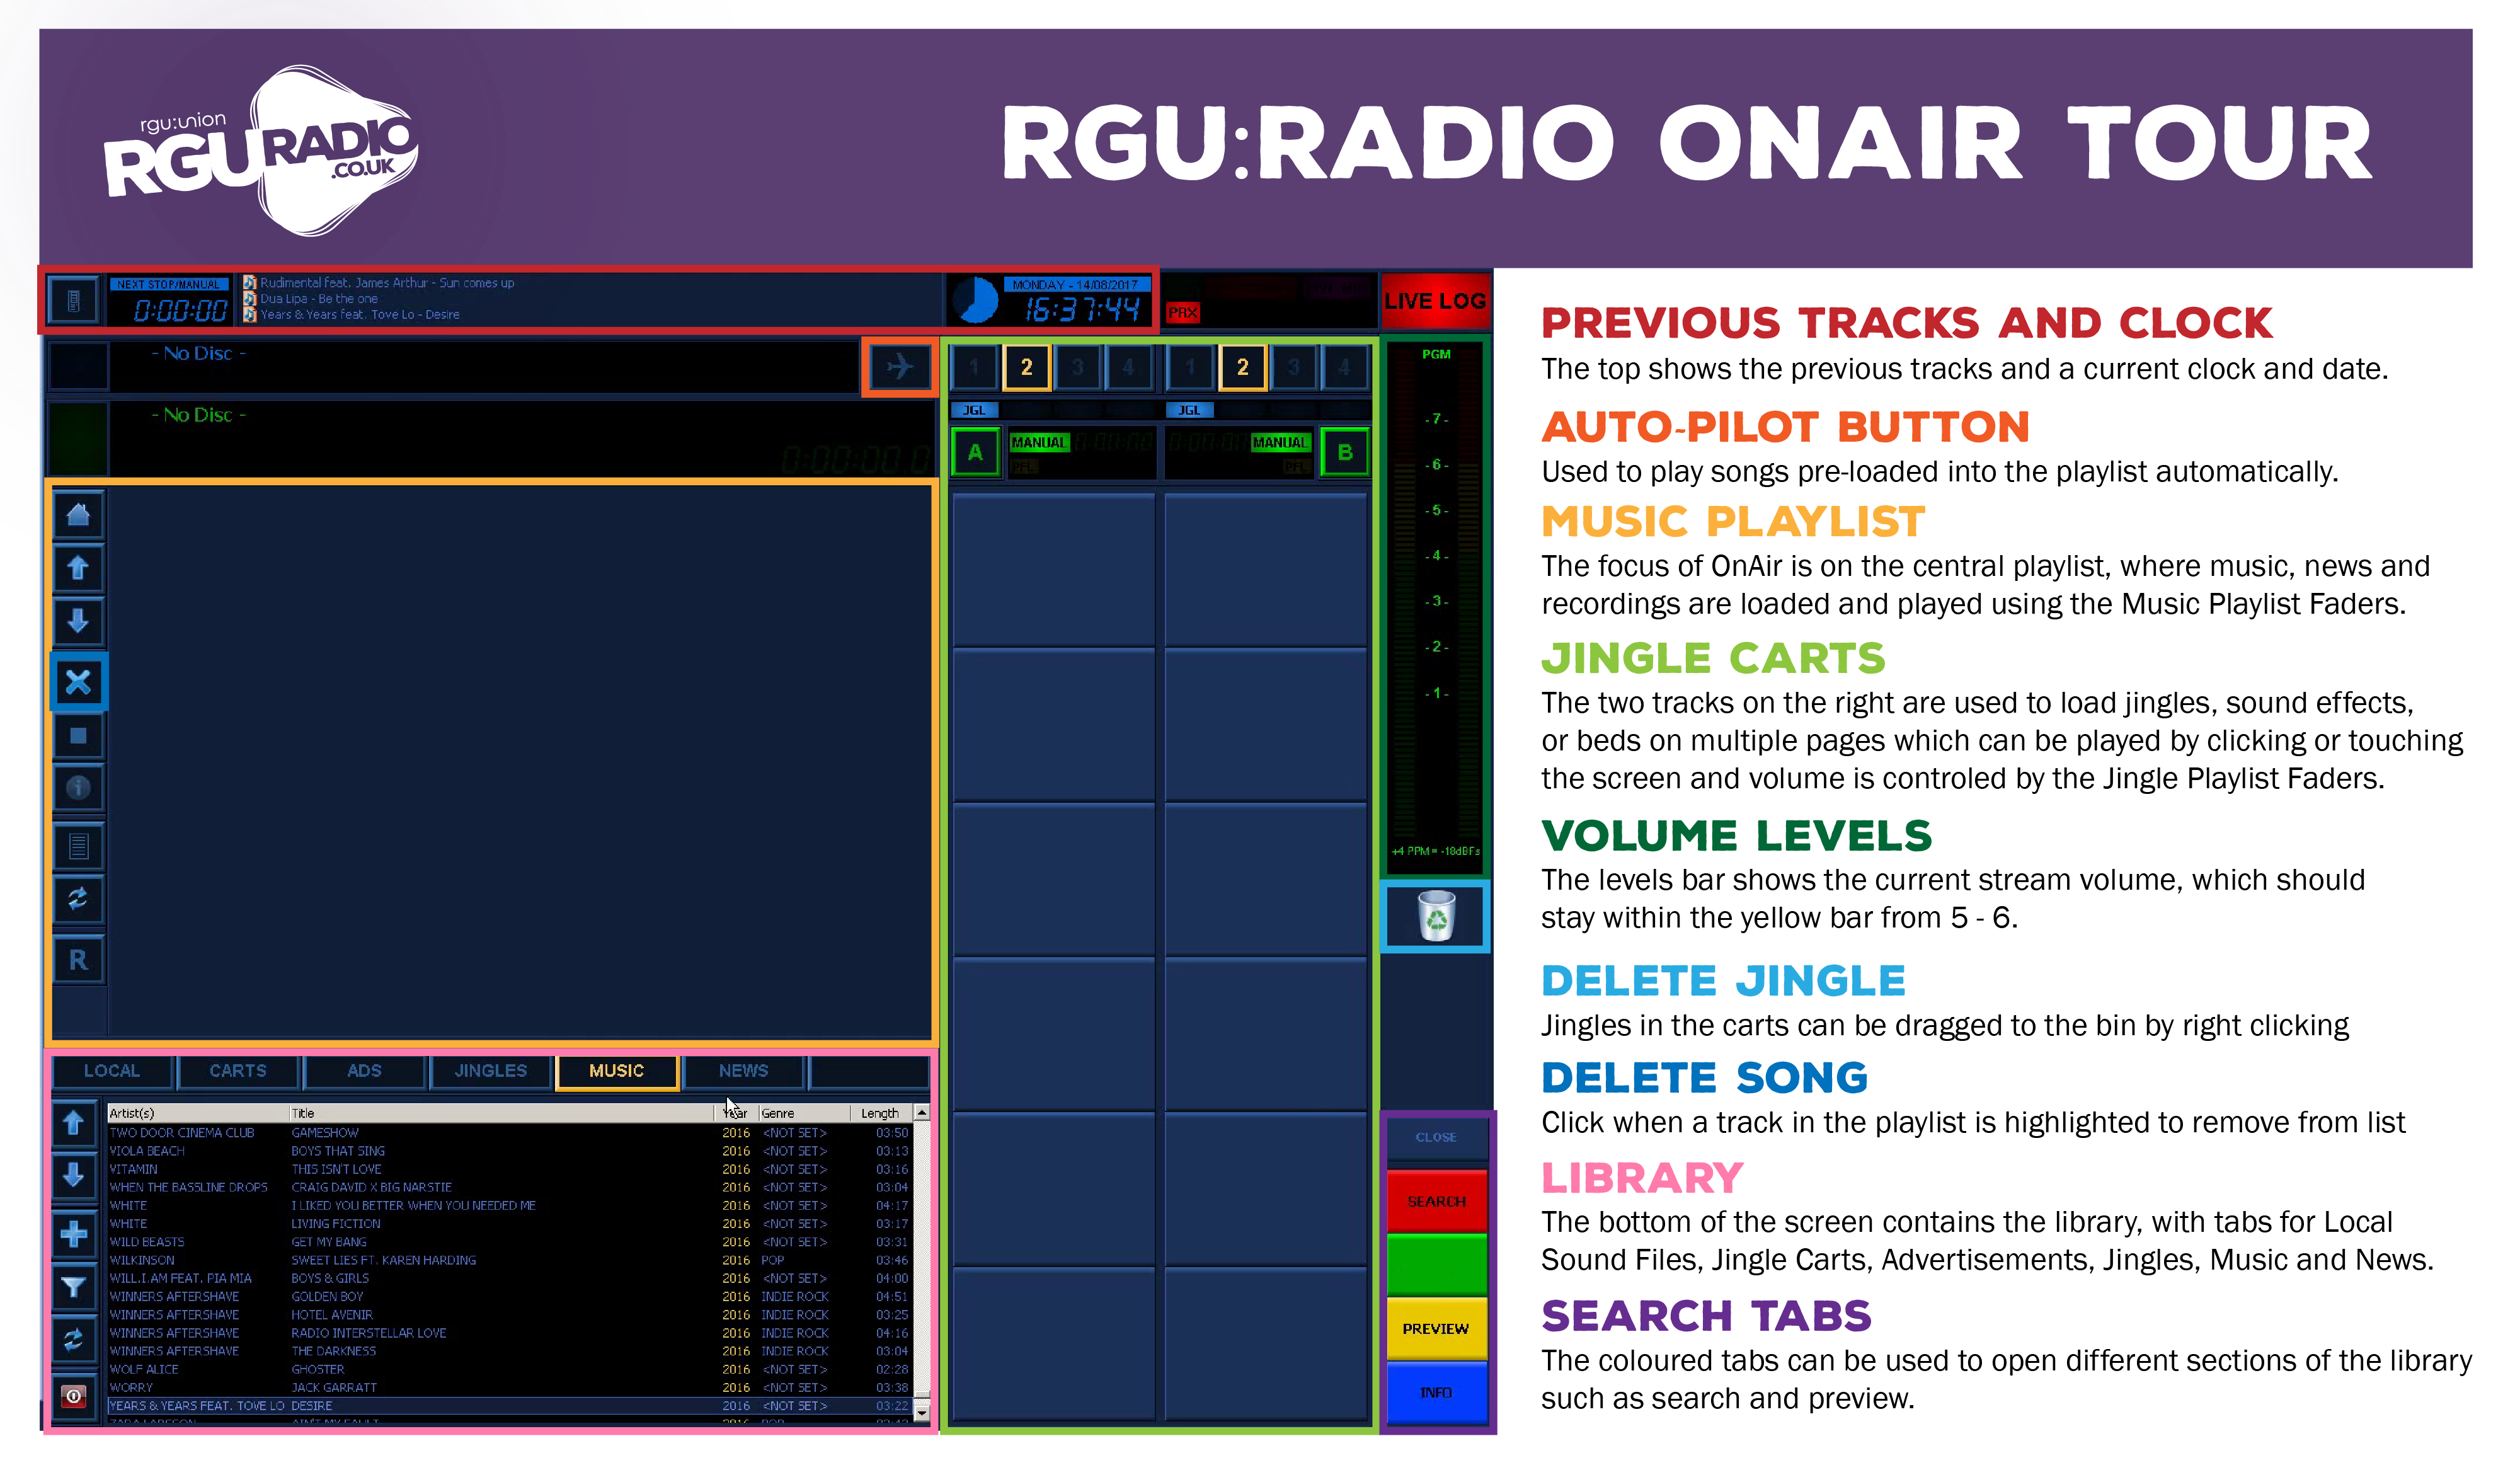
OnAir Tour
Along with knowing how the mixing desk and equipment works, you will also need to know how the main broadcasting software OnAir works.
- Music Playlist: In the centre of the OnAir system, you can find the music playlist, which is the place to drag and drop any music, news, features or otherwise that you will be using throughout your show. It is possible to import a template which will fill up the playlist, and presenters can also use the auto pilot mode to automatically play through each item loaded up on the Music Playlist. This playlist is directly linked to the Music Playlist A and B faders on the desk and when a fader goes up, the top track automatically plays.
- Jingle Carts: On the right of the screen are the two jingle tabs which have multiple pages to allow a presenter to load up a variety of news, jingles, sound effects, beds and more. These are directly linked to the Jingle Playlist A and B faders, but do not play automatically. The individual sound would be played when clicked or tapped.
- Volume Levels: On the far right of the screen is a volume level for the stream which presenters must make sure stays within the yellow limits (usually between 5 and 6). When a pre-fade button is pressed, a second level is visible which shows the current sound for that particular item.
- Libary: On the bottom of the screen is the full library of items including Music, Jingles, Advertisements, News and more. Presenters can scroll through these lists and click and drag items to either the playlist or the jingle carts, or they can use the red search function to find a specific item.
Hosting a Show
Running your own show on RGU is simple. Once you get used to the simple step by step of hosting a show, using the equipment can be really easy. It might take a little while to get the hang of it, but you could be running your own weekly show in no time! Here are some simple steps for you to host your own show!
Click to Learn About Hosting a Show
Before Your Show
Step One - Pre-Fade Your Microphone
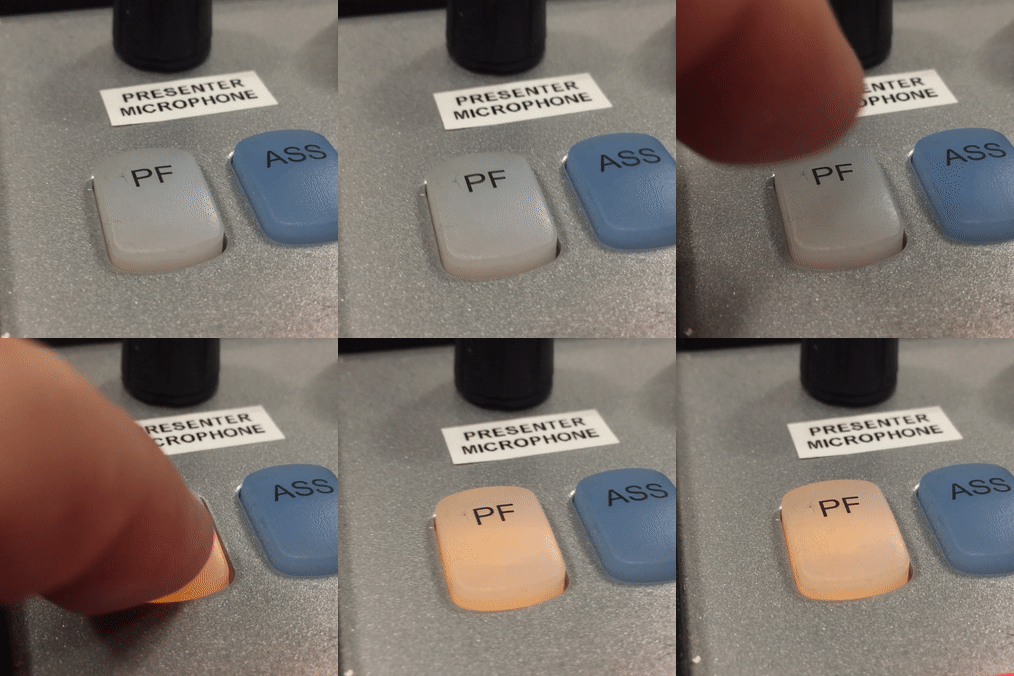
Press Pre-Fade Button
Keep the microphone fader down, and press the Pre-Fade button to test your volume levels when speaking.
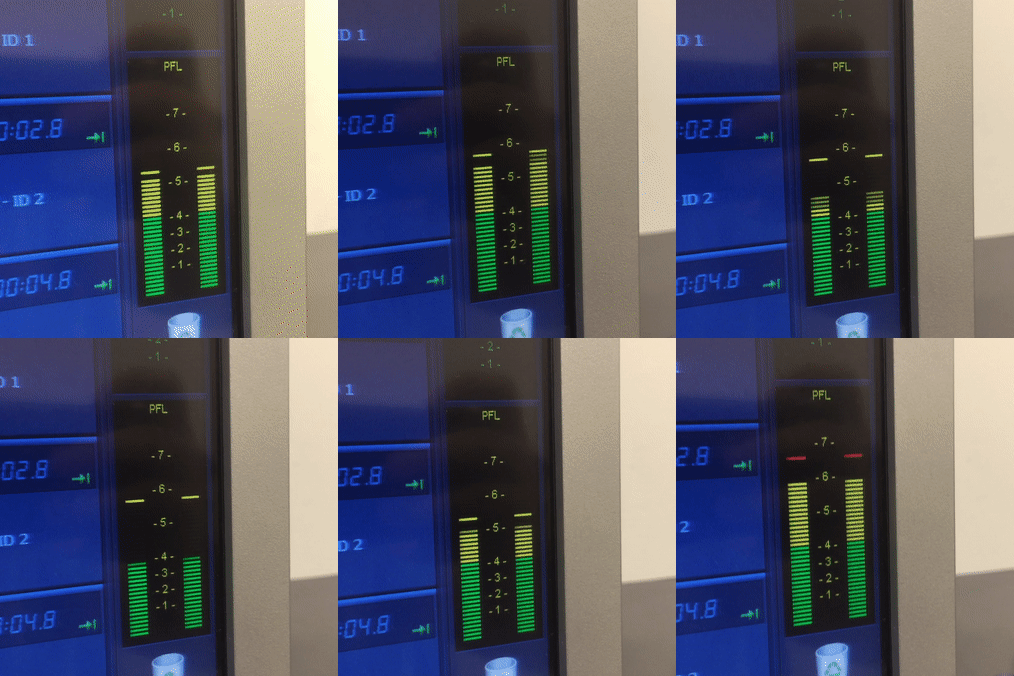
Check Your Levels
On the OnAir screen, check the Pre-Fade Level when speaking to see if it stays within the yellow limit.
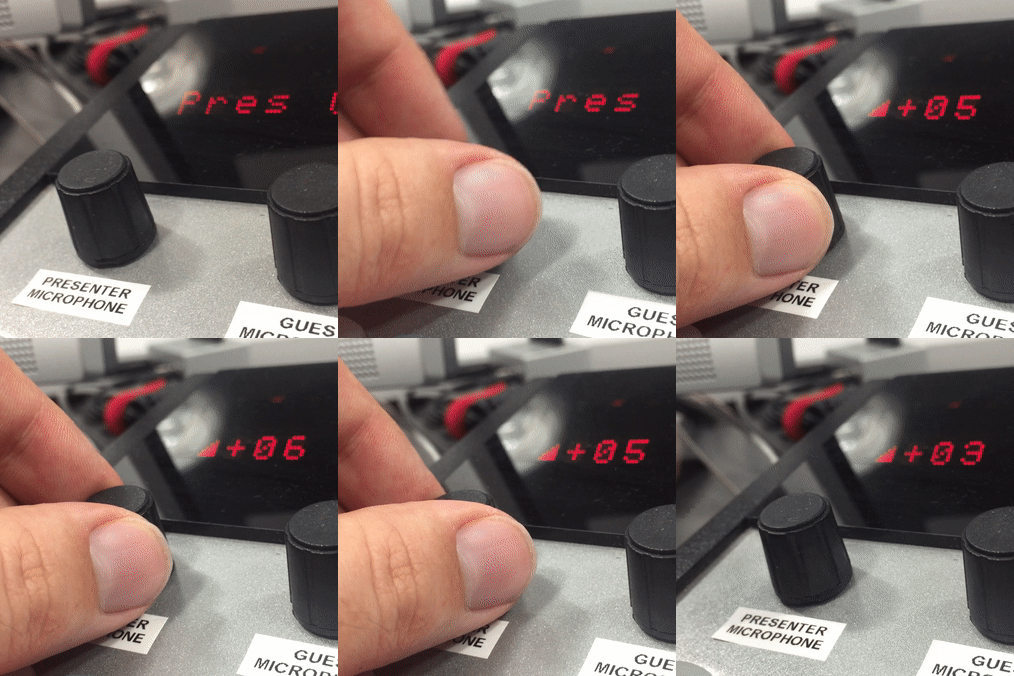
Adjust the Volume
Twist the black dial to control the volume level up or down so the levels stay between 5-6 when talking.
Step Two - Load Your Music and Jingles
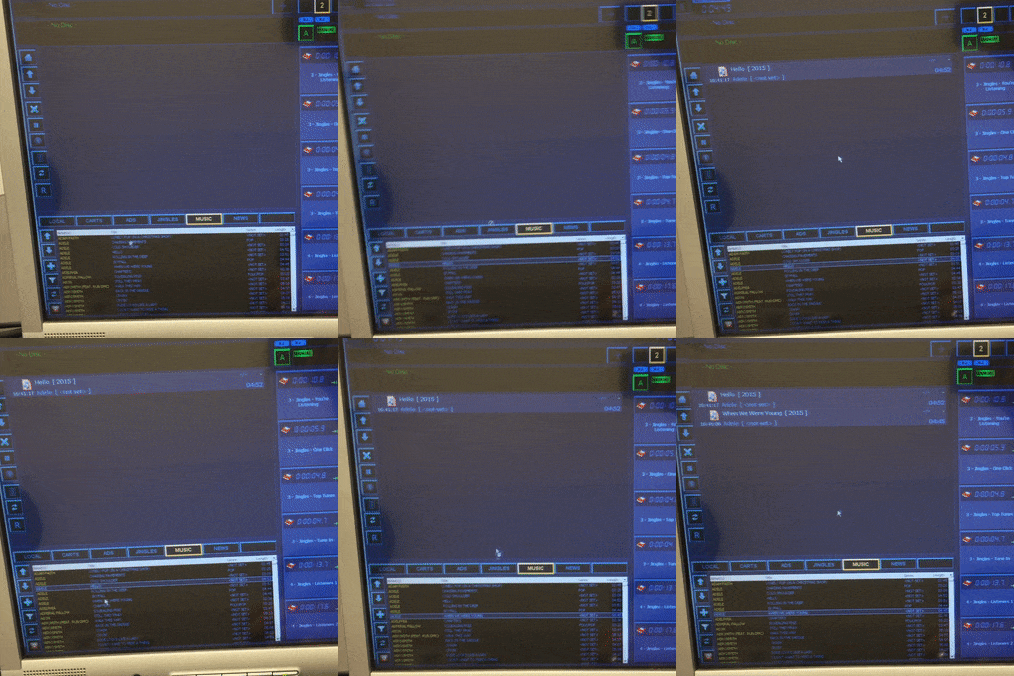
Load Your Music
Scroll through the library to find the songs you want to play and drag and drop them onto the playlist.
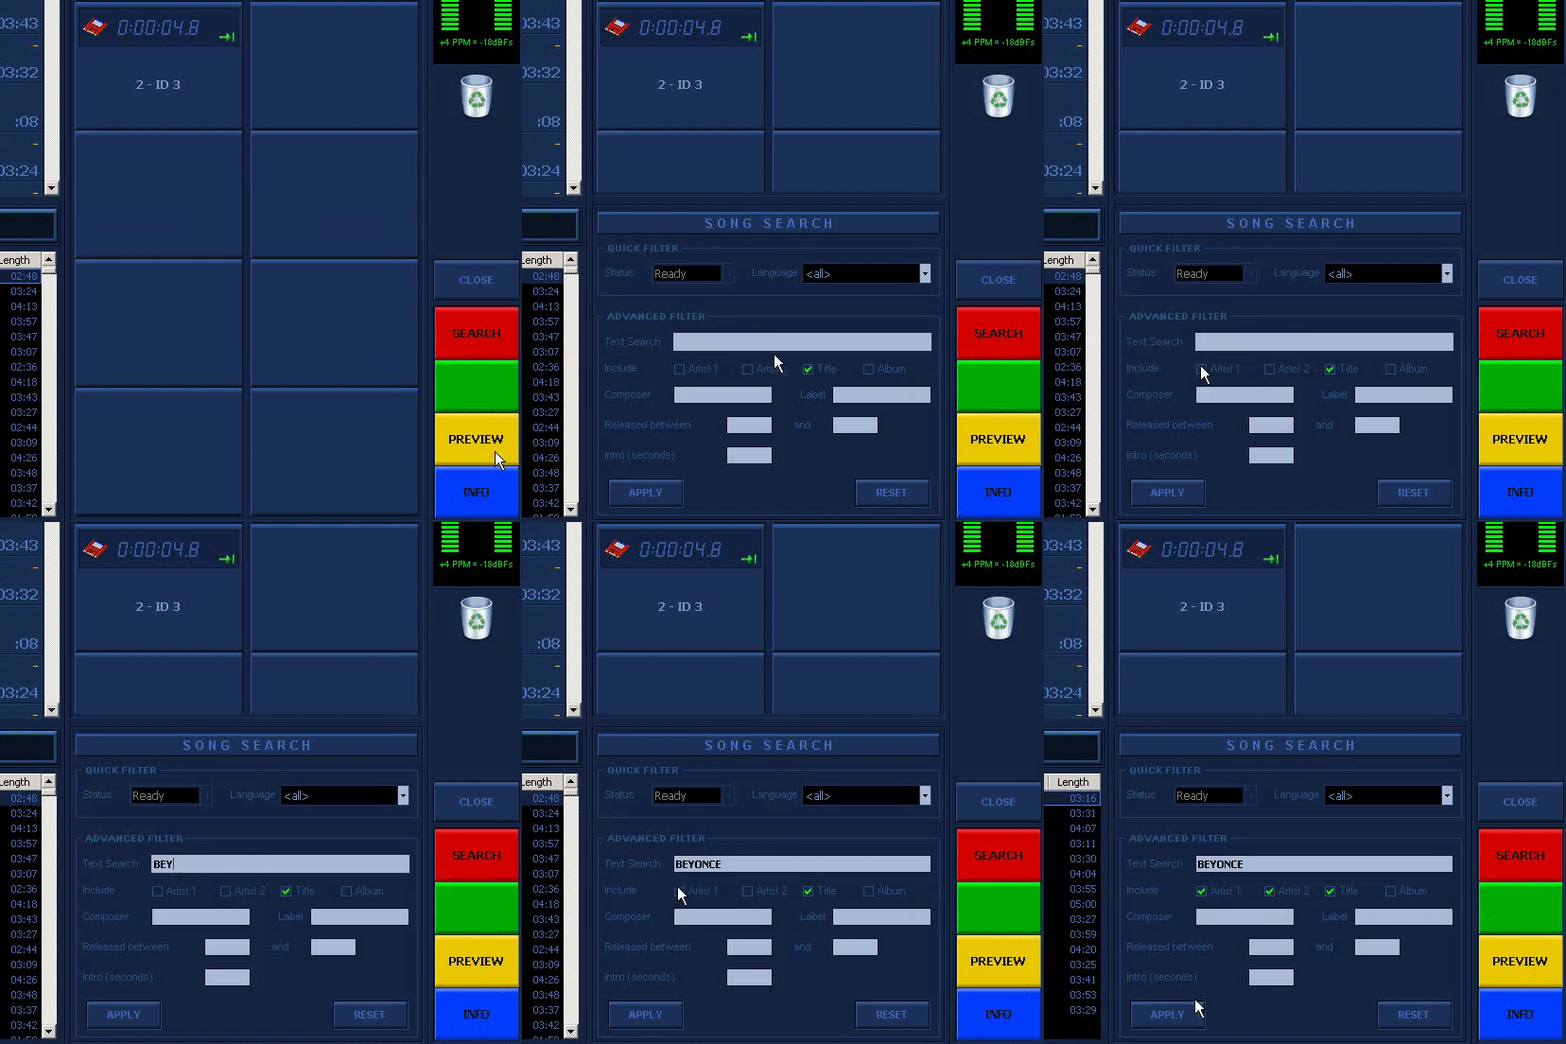
Search for Your Tracks
Push the red 'Search' button the load the sidebar to allow you to search the library for the right song.
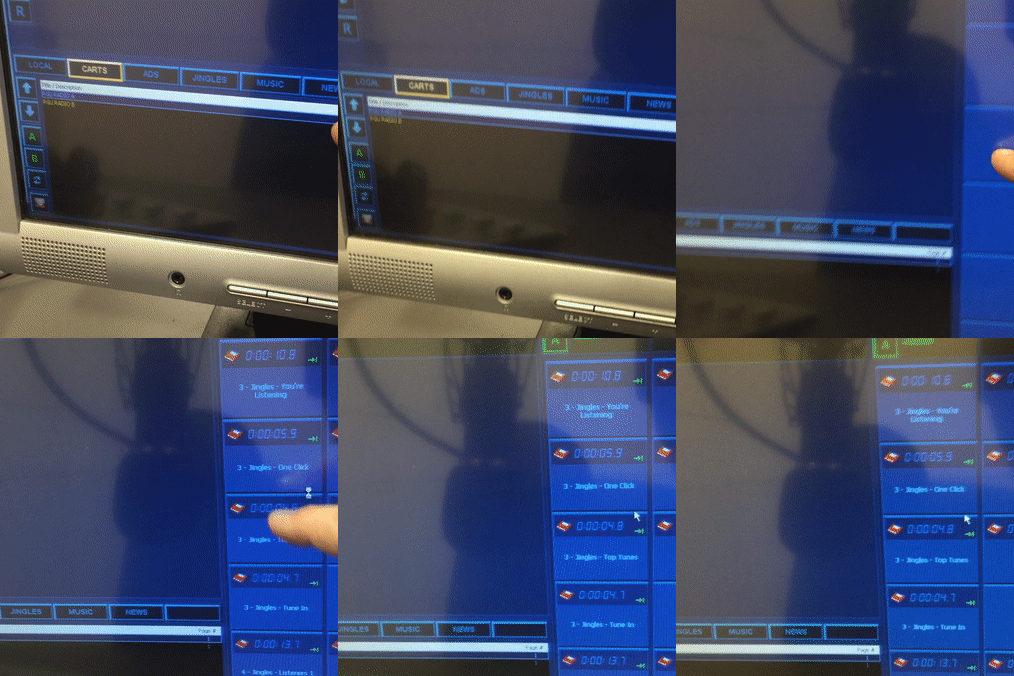
Load Your Jingles
From the Cart tab, load the RGU:Radio jingles, or use the Jingles tab to load your own sounds.
Step Three - Connect to the Stream
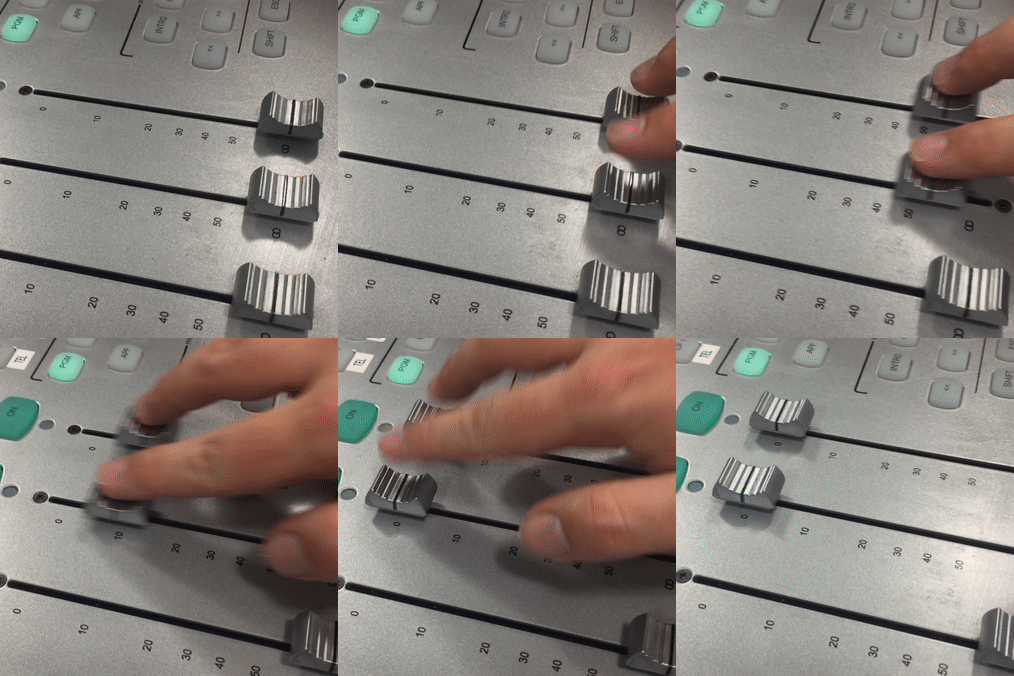
Keep Jingle Faders Up
Before you stream, keep your jingle faders up so you can tap the screen to automatically play your sounds.
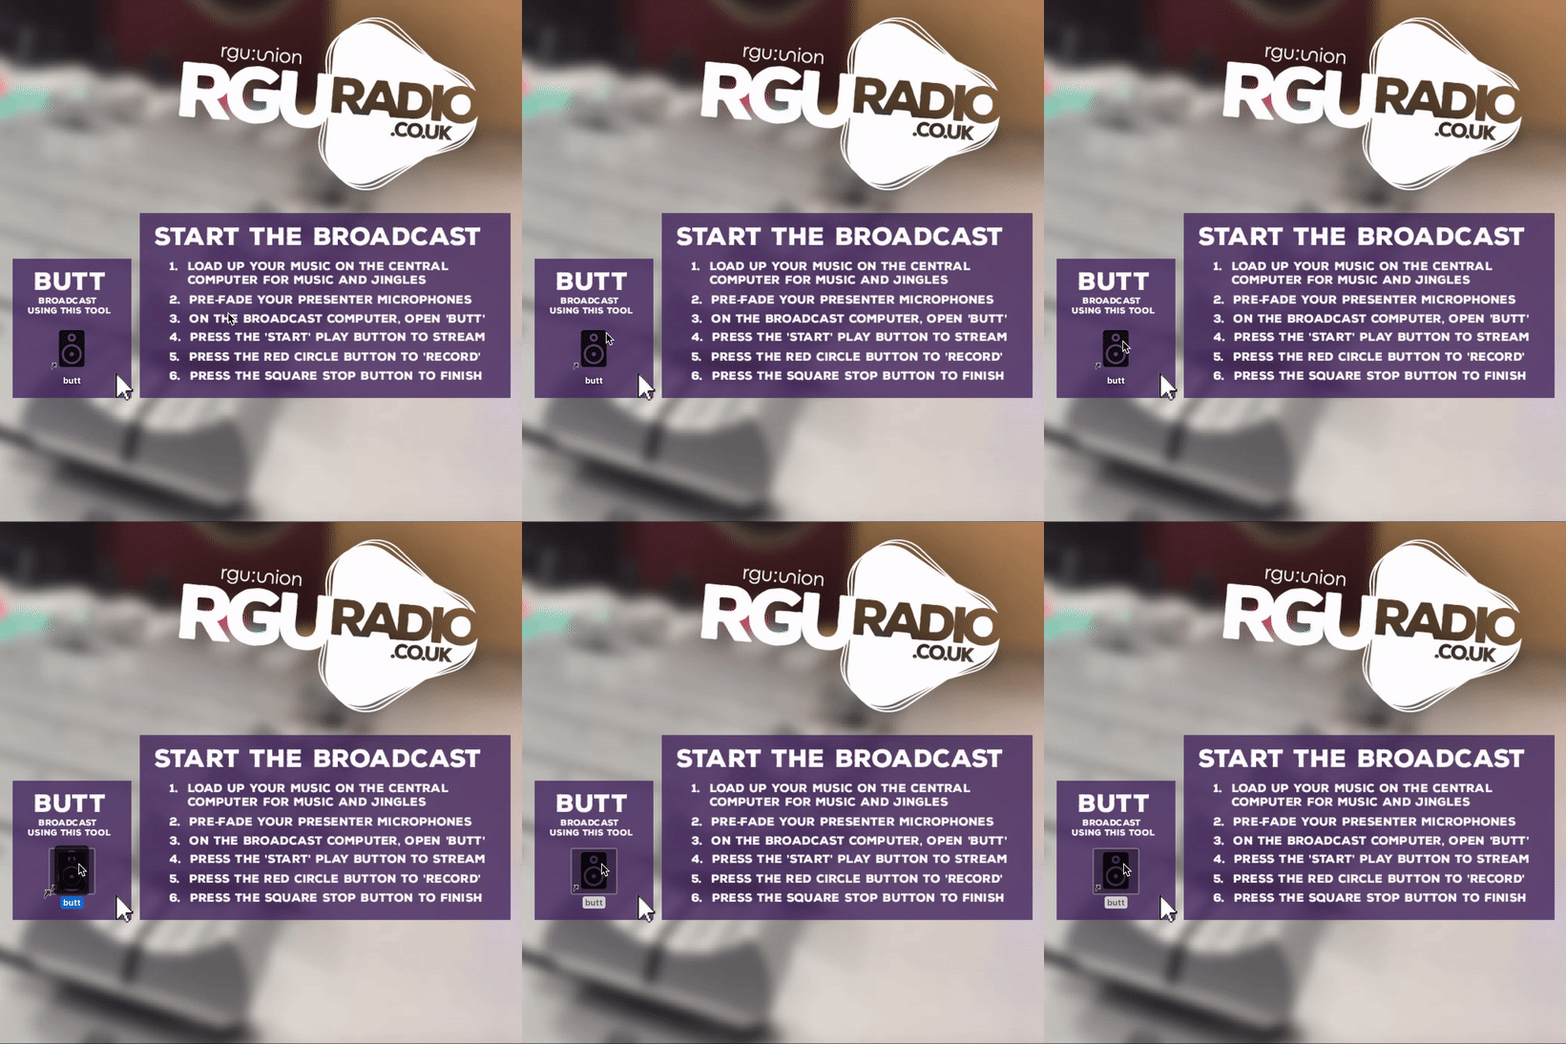
Open the Broadcast Tool
On the Broadcast Computer, open the 'Broadcast Tool' application from the desktop.
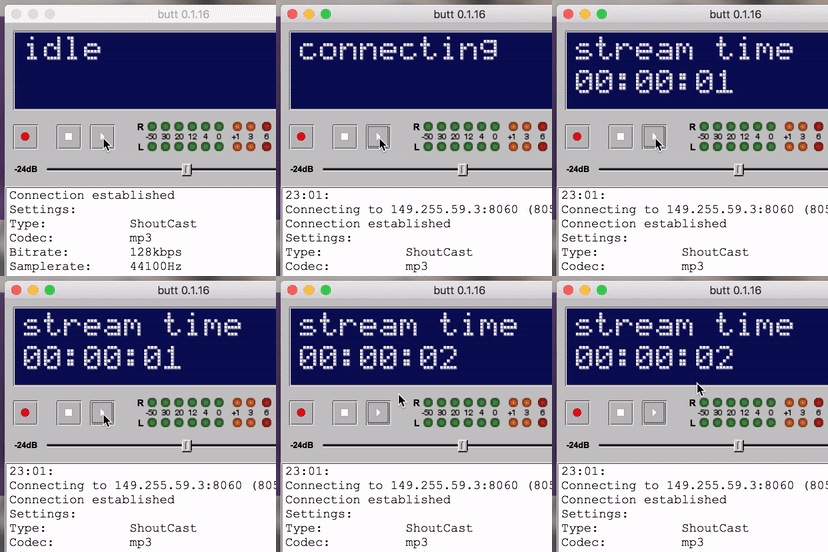
Press the Play Button to Stream
On Broadcast Tool, press the 'Play' button to connect the stream. Remember to press 'Stop' when you finish.
During Your Show
Step Four - Run Your Show
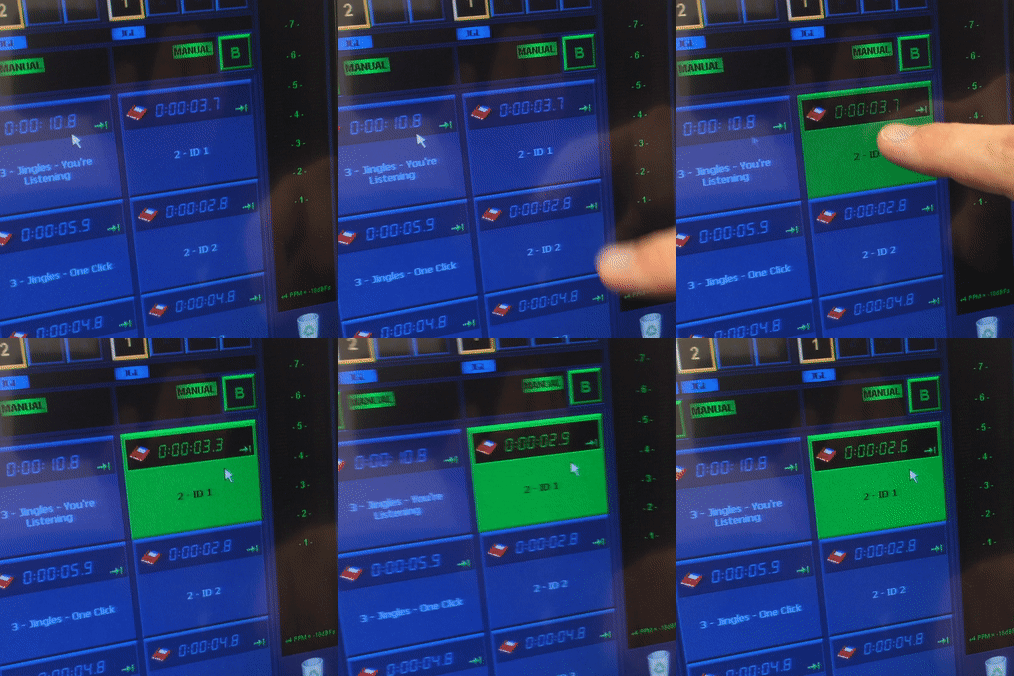
Tap to Play Jingles
Throughout your show, tap the jingles, beds or sound effects to play. Remember to keep faders up.
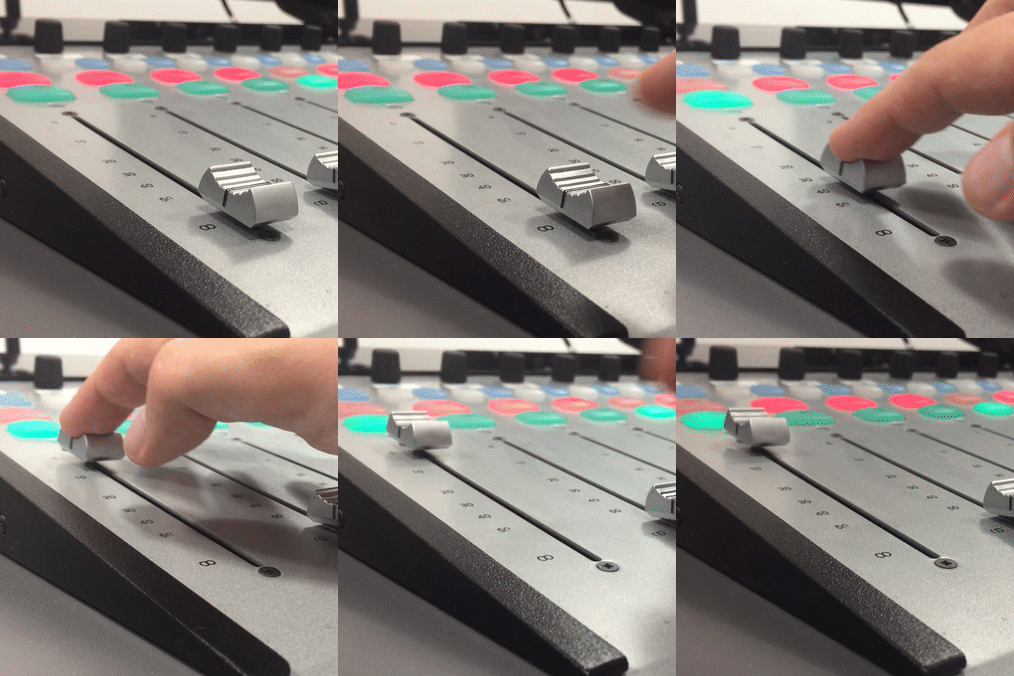
Fade Up Presenter Microphones
When a presenter needs to speak, simply slide up their fader, and slide it down when they finish.
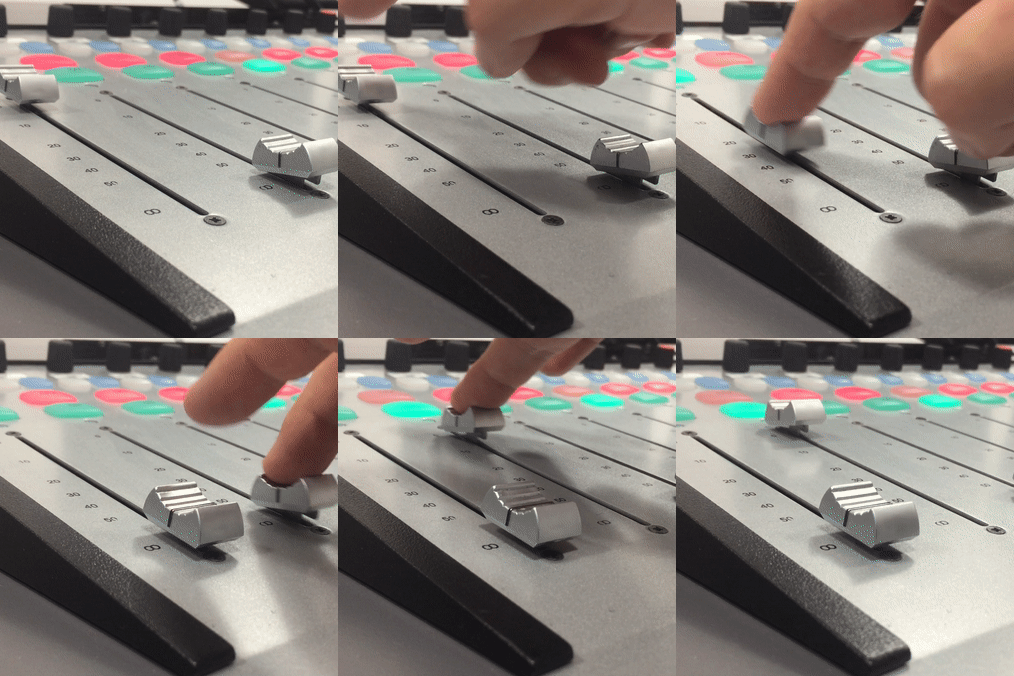
Swap and Fade Up Music
Use the Music Playlist Faders to play tracks and fade down one, and fade up the other to change tracks.
Adding Music to the System
Once you have got the hang of using the equipment and you are ready to run your show, you will probably want to add your own music, jingles or news to the radio system. It can be complicated the first time you add music, and will take a while to remember each step, but this guide should take you easily step-by-step through the process:
Click to Learn About Adding Music to the System
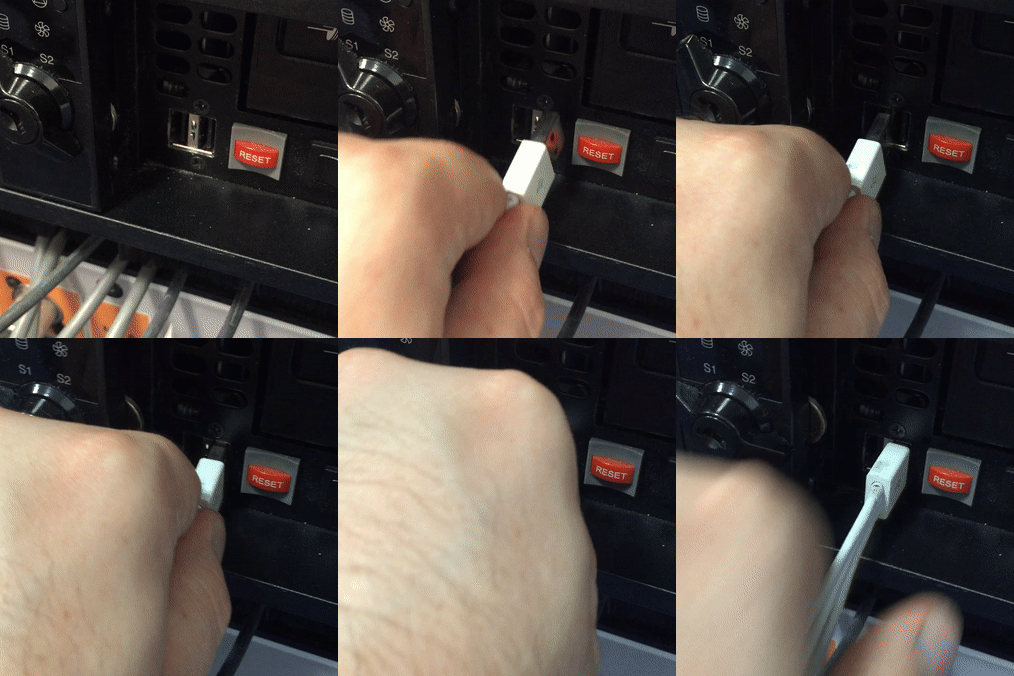
Insert USB or CD
In the Computer in the Media Unit, open the black hatch and insert your USB or CD with music on it.
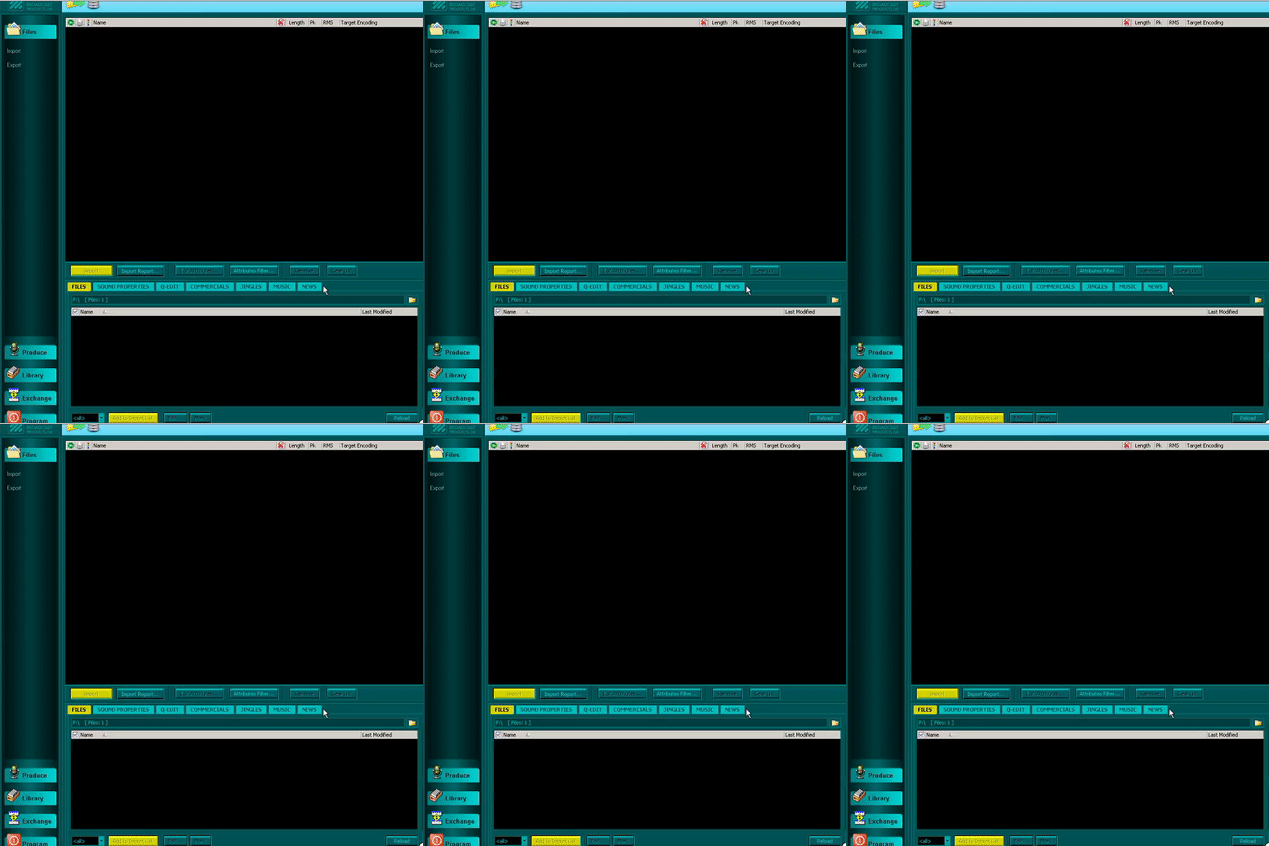
Open 'Production' App
Open the 'Production' app by opening the menu on the top right of OnAir. Use the password 'ENGINEER' when it opens.
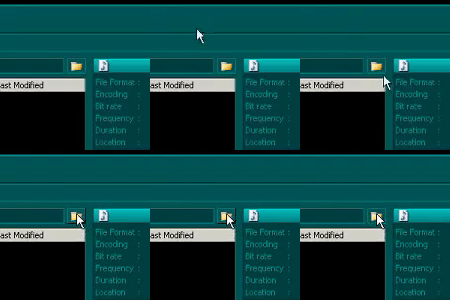
Open Your USB
In Production, go to 'Files' and 'Import' and then at the bottom of the page, click the folder icon and find your USB or CD.
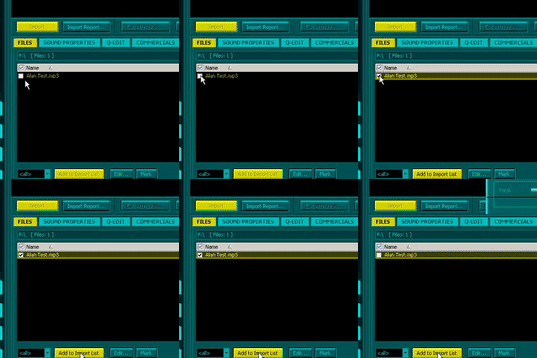
Add Files to Import List
Locate your files on the bottom search bar, check them, and then click to 'Add to Import List'
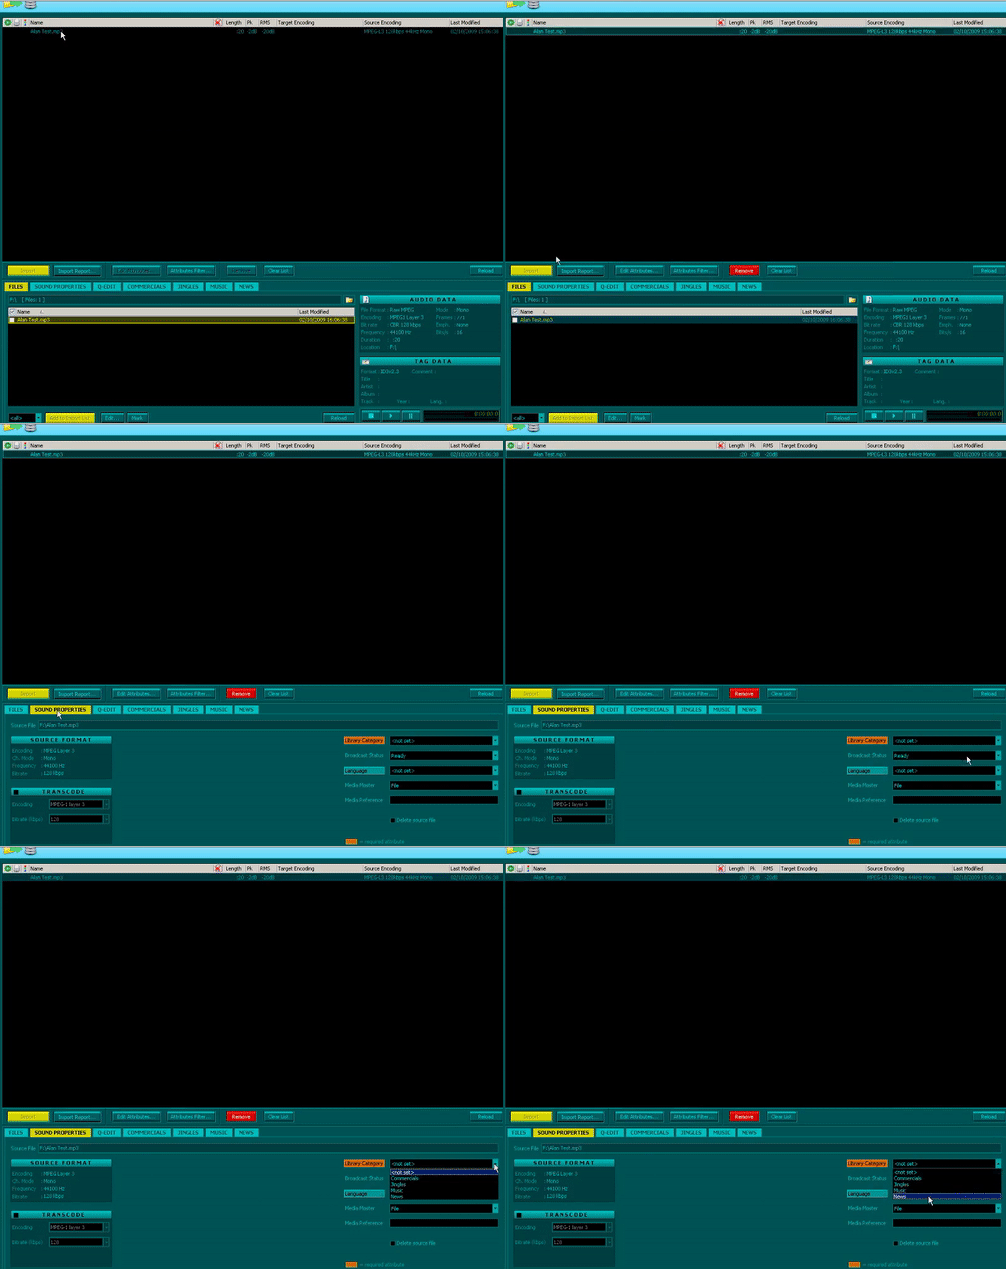
Add Sound Properties
Before a song will import, you must click on it, and go to the 'Sound Properties' tab at the bottom and choose a category, before going to the 'Music' or 'Jingles' or ' News' tab and add information.
Click to Import
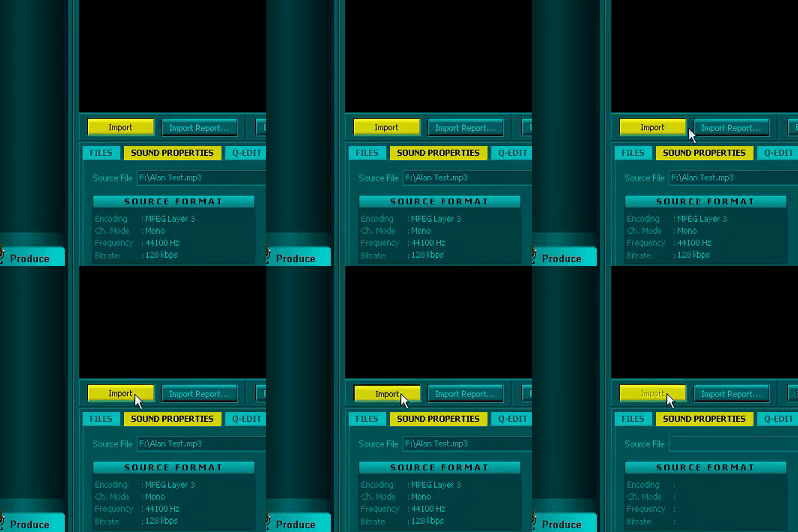
Once you have added all the details for your file and there is a green dot next to them, click to 'Import'.
Planning Your Show
While you can get to grips with all the technical aspects of the radio station, it is also important that the content you use on your show is also well planned and relevant to the audience. While it is possible to 'wing it', the best shows come with a plan and you will be much more prepared when you run your show. There is no perfect way to plan your show, but these are some ideas about what you can do:
Click to Learn About Planning Your Show
Writing Your Show Plan
One easy way to help be prepared for running a show is to write down a simple show plan. Before you go into the studio try and write down the songs you would like to plan, and plan out any links and features you might do. These are some ideas for planning your show:
- Introductions: At the start of the show you should think about how you will open the show with information like the presenter name, show name, time and date as well as and outline of what is happening in your show
- Music: While you can search for music on the system, if you have a particular theme or style, it is worth writing down songs you would like to play on your show. You should also be prepared to find your own music, and have it on a USB in MP3 format to be added to the system.
- Jingles and Sound Effects: If you have any custom jingles you use for your show, or perhaps you would like sound effect or beds, you should have them ready with you on a USB and note them down in your show plan.
- Links: A simple aspect to plan would be links between songs where you might mention the artist and title of the previous or next song, as well as perhaps some facts or information about the song or the show. Links could also be more detailed with the presenter discussing a personal anecdote, commening on a song or news, or giving some other information.
- News: Your show might also have a new feature. You will need to source current news content and write a full script which is timed with sharp headlines and simple informative paragraphs. This could be pre-recorded, edited and played on the show, or read live at a certain time.
- Features: When writing your plan, you can plan times for songs and links, but it is also worthwhile thinking of unique features you could run on your show. These features could be anything from interviews, discussions, competitions, games, quizes, call ins, live music, or otherwise. Work with the RGU:Radio Committee and producers to think of realistic and engaging features which make your show unique to RGU and interesting. You will need to make sure you plan these features in advance and have anything you need for them ready.
Show Timing
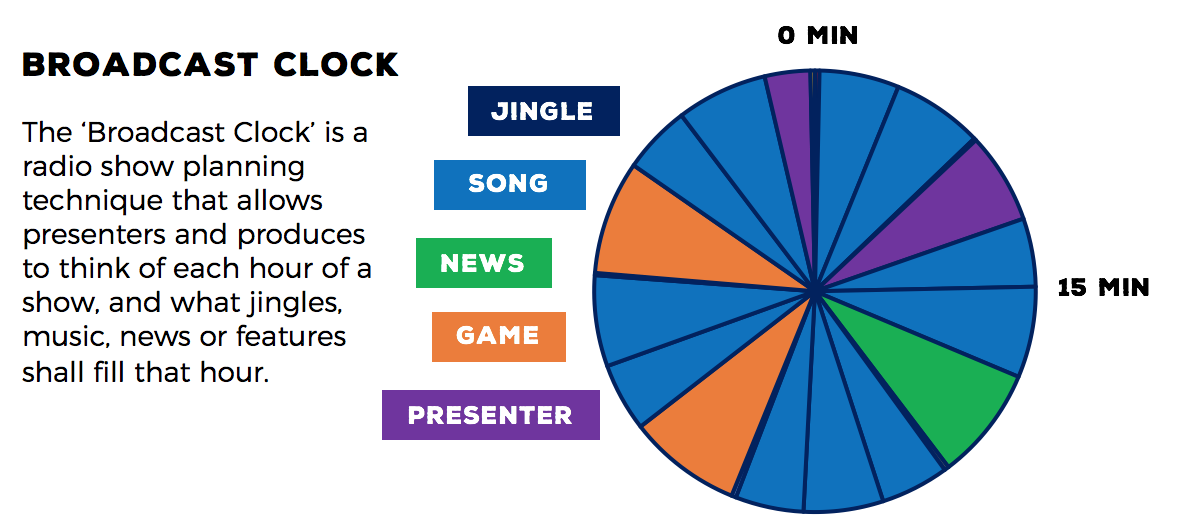
Once you have the bare content of your show, you should look to plan out your timings, using tools such as the 'Broadcast Clock'. Depending on the structure of the show day, you may have strict timing limits such as times for news or for the show to end before the next one, for these, you will have to be precise with the length of your links and features to fit in all the music you plan to play. Some top tips around timing:
- Spread your features out throughout the hour, giving a break for songs inbetween, usually twenty minutes between features.
- After long periods of talk, such as the news and long features, the audience appreciates some more music to tune out to – so play two or three songs in a row.
- Save the best feature until near the end of the show. You can keep plugging it throughout the programme to entice listeners.
- Mention the contact details as often as possible, whether it be social media, email or telephone/text.
Along with doing your Show Plan and writing down the content of your show, you can use a broadcasting technique called the 'Broadcast Clock' to look at the items on your show plan, and fit it into a clock face in segments to allow you make sure you stick exactly to time.
Making Your Content Relevant
Whatever your show idea is, it will only be successful if it appeals to your audience. Define what it is your show is all about and what the people listening to it will get out of their time listening. With student radio, you are competing against national radio (such as the BBC), local radio (such as Northsound) and online podcasts too, so why would someone listen to RGU:Radio?
- Local: RGU:Radio's unique selling point is that it is run by RGU students and is the only place to get content specific to RGU. Use that to your advantage. Always look to make your content local, as the 'RGU-ness' of an idea could be the hook that brings people in. Whether it is about music, news, sport or otherwise, why not ask for opinions of RGU students? Cover RGU stories? Involve your firiends? If we build content with our communities, they will be more likely to listen and that can help us beat the competition.
- Personality: Use your show to be all about your individual point of view and share your likes and interests. Help your audience get to know you, connect with you, and feel like they are your friend, even if they don't know you. Your radio personality could bring listeners back again and again.
- Entertainment: We all want to be entertained, so plan your show to create an emotional connection with the audience to help them laugh, cry or feel something.
- Topicality: Radio is live, so use what is happening right now as content. Talk about news, current affairs, films, music or television. People like to share their interests with others, so make your show related to current student life.
-
Recording and Uploading Your Show
Coming Soon
Media Law
Coming Soon